
Garage Door Repair
How-to guideRepairing Garage Door Panels and Hinges: A Homeowner's Guide
September 18, 2026 · Prime Garage Doors
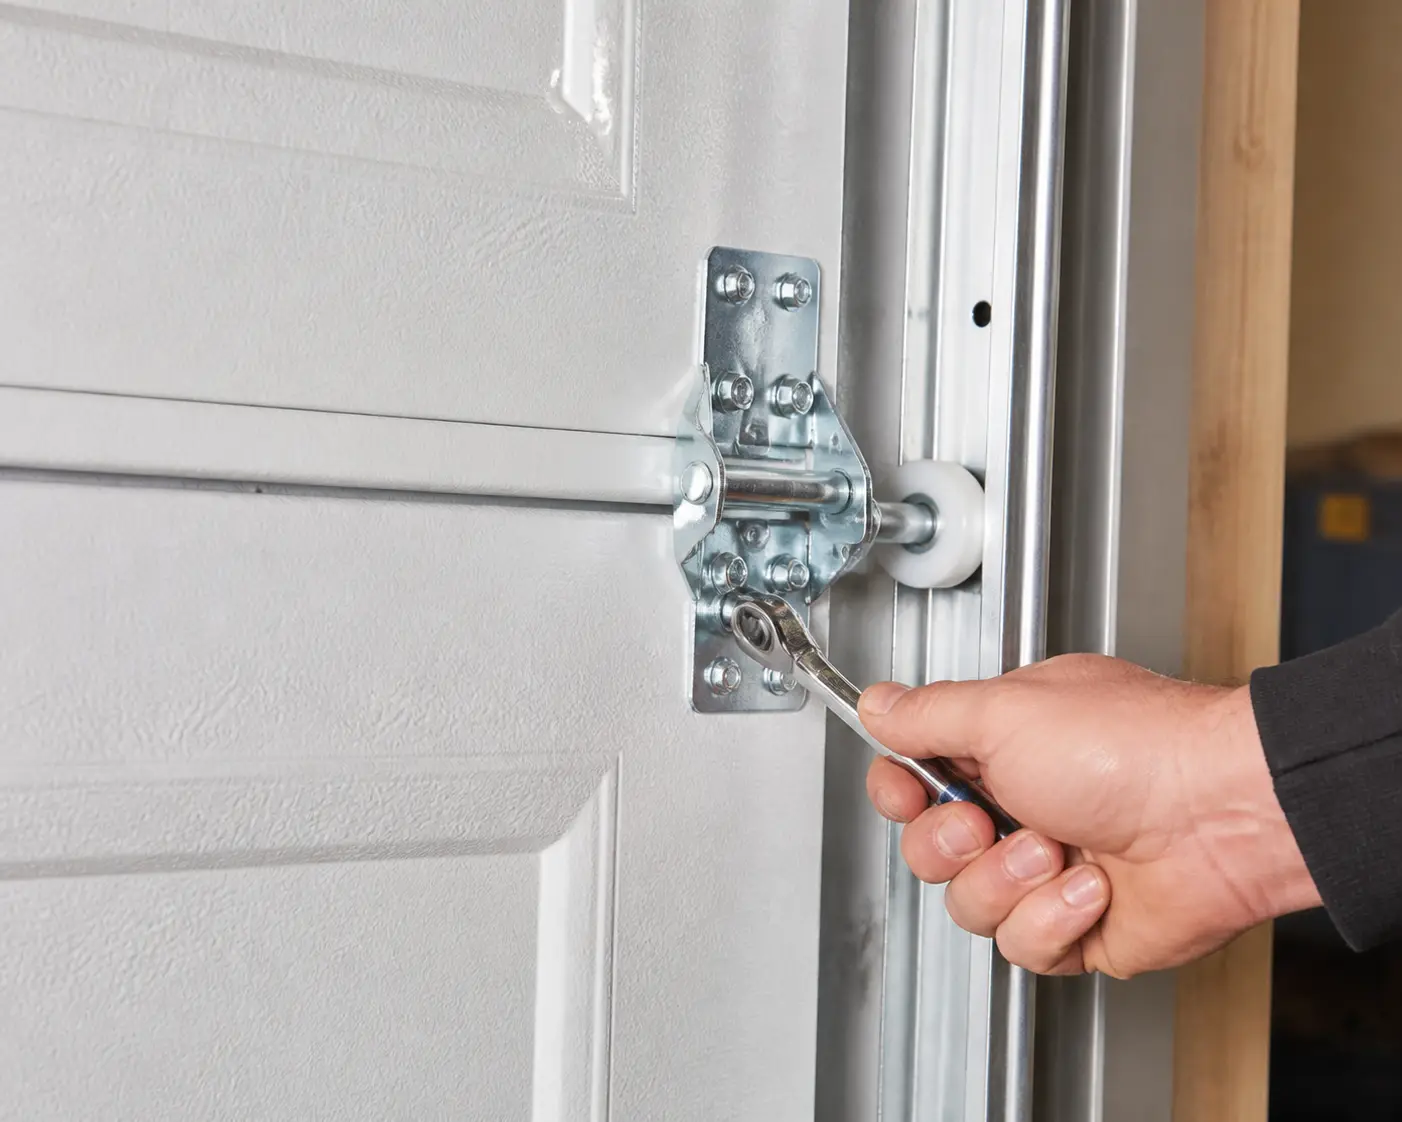
Need help repairing garage door components safely? Discover essential inspection steps for panels, hinges, and rollers, and learn the best practices for servicing garage doors.
Repairing garage door panels and hinges involves securing the door assembly, replacing worn intermediate hardware, and installing reinforcement struts to restore structural integrity. Addressing cracked hinges or sagging sections promptly prevents motor strain and keeps your door moving smoothly along its path. Experienced professionals serving Greater Boston handle panel realignment and hardware replacement to maintain safe, quiet daily operation.
Understanding Garage Door Panel and Hinge Wear
Sectional garage doors rely on a system of stacked panels joined by steel hinges to open and close smoothly. Every time the door travels upward, these hinges pivot, allowing the individual panels to navigate the curve of the garage door track system. Over thousands of cycles, the physical demands on this hardware are significant. Metal hinges experience friction and mechanical stress, while the panels themselves bear the weight of the entire door during operation.
In New England, local weather conditions accelerate this structural wear. Severe winter cold snaps, humidity fluctuations, and exposure to road salt tracked in by vehicles create an environment prone to metal corrosion and surface deterioration. Moisture can enter minor surface scratches, leading to rust around hinge mounting holes. When rust or fatigue weakens a hinge, the door panels no longer bend uniformly. Instead of flexing cleanly, panels can bind, causing the sheet metal or composite wood around the hardware to stress, bend, or crack.
Accidental impacts are another common cause of section damage. Backing a vehicle into the lower section of a door creates immediate structural deflection. Even a slight dent alters how weight is distributed across the overhead system. Operating a door with compromised sections forces the electric opener to pull against abnormal resistance, which damages opener gears, wears down rollers, and puts uneven load on the lift cables. Taking steps to fix a broken garage door before minor panel stress spreads prevents full system failure.
Signs of Damage and What to Inspect First
Before beginning any repair work, homeowners should perform a visual inspection to determine the scope of the issue. Reviewing practical garage door repair tips and catching hardware failures early prevents door panels from tearing or buckling out of alignment.
Audible Popping or Screeching: Loud popping noises during operation often indicate that a hinge pin is binding or that mounting screws have stripped, allowing the hinge to shift under load.
Visible Stress Cracks: Check the interior skin of the panels near the hinge attachment points. Hairline fractures in the metal or wood indicate severe mechanical fatigue.
Gaps Between Panels: When the door is fully closed, look for light passing through horizontal panel joints. Uneven gaps mean hinges are bent or panel sections have sagged.
Elongated Screw Holes: Loose hinges often pull away from the section face, stripping out the self-tapping sheet metal screws and enlarging the original mounting holes.
Crucial Safety Warning: Never attempt to remove or adjust the bottom roller brackets attached to the lowest section. These bottom brackets are under continuous, extreme tension from the lift cables. Attempting to loosen them without specialized tools can cause severe injury. High-tension hardware adjustments must always be left to trained service technicians.
To safely carry out basic intermediate hinge replacement and panel reinforcement, gather the proper tools before starting:
Replacement intermediate hinges matching your door's gauge and number stamp
Galvanized self-tapping garage door fasteners
Impact driver or socket set
C-clamps or locking pliers to lock the door in position
Steel strut or horizontal reinforcement bar (for cracked panels)
Personal protective equipment, including work gloves and safety glasses
How to Repair Garage Door Panels and Hinges: A Step-by-Step Guide
Follow these sequential instructions to replace compromised intermediate hinges and reinforce sagging door sections safely.
Step 1: Secure the Door and Power Down the System
Safety is the primary consideration when working on overhead doors. Begin by disconnecting the electrical power to the garage door opener so the system cannot activate automatically while you are working. Lower the garage door completely to the floor so that all weight rests on the ground and no energy remains in the lifting mechanism. Place heavy-duty C-clamps on the vertical section of the garage door track system directly above the top rollers on both sides. Clamping the door securely prevents any unexpected upward or downward movement during repair work.
Step 2: Inspect Hardware and Select Replacement Parts
Examine the numbering stamped into the body of each damaged hinge. Standard sectional doors use numbered hinges (#1, #2, #3, and so on) depending on their vertical position on the door. The lowest intermediate hinges joining section one to section two are typically stamped with a #1, while higher section joints use progressively higher numbers to offset the rollers relative to the garage door track system. Match the stamp on your replacement hinges exactly to ensure proper alignment and seal against the door frame.
Step 3: Remove Loose or Damaged Intermediate Hinges
Working on one hinge at a time, support the panel section so it does not sag when hardware is removed. Use an impact driver or socket wrench to remove the mounting screws securing the damaged hinge to the upper and lower panel faces. Inspect the screw holes on the door body. If the holes are enlarged or torn, moving the new hinge slightly or installing a steel backer plate will be required to give the new fasteners solid anchor metal.
Step 4: Realign the Joint and Install New Hinges
Position the new hinge over the panel seam, ensuring the hinge pivot point aligns directly with the joint line between sections. Drive self-tapping garage door screws straight into the designated mounting points. Do not over-tighten the screws, as stripping out the sheet metal backer will compromise the hold. Once installed, verify that the hinge leaf moves freely on its pivot pin without binding or twisting against the panel face.
Step 5: Reinforce Creased or Sagging Panels
If a section has developed a horizontal crease or crack across its face, installing a steel reinforcement strut is necessary to restore stiffness. Measure the full width of the section and place a steel strut horizontally across the top lip of the damaged panel. Secure the strut to the panel interior using self-tapping fasteners placed at every vertical stile support point. This strut acts as an iron bridge, preventing the damaged sheet metal from bowing or collapsing inward when the door travels horizontally overhead.
Step 6: Test Articulation and Apply Target Lubrication
Remove the C-clamps from the garage door track system and restore electrical power to the automatic opener. Cycle the door manually or via the wall button through one complete opening and closing cycle while observing the newly repaired area. Watch the hinge joints closely as they navigate the curved portion of the track. After confirming smooth movement, apply a non-silicone garage door lubricant directly to the hinge pivot pins and roller bearings. Keep lubricant away from panel faces to avoid attracting dust and dirt.
Post-Repair Care and Maintenance Tips
Consistent preventative care significantly extends the lifespan of door sections and joint hardware. Inspecting garage door components twice a year—ideally in the spring and fall—allows homeowners to spot loose screws, metal oxidation, and panel stress before structural failure occurs. Following routine garage opener maintenance alongside hardware checks ensures long-term operational health.
Proper lubrication habits protect hinges and rollers from premature wear. Use a dedicated garage door lubricant or light spray grease on all dynamic pivot points. Be precise with application: only moving bearings, rollers, and hinges get lubricated—never lubricate the inside of the track channels. Applying grease or spray inside track channels collects dust, road grime, and debris, forming a sticky slurry that causes rollers to skid instead of turn cleanly. Staying proactive with hardware adjustments is key to quick garage door repair prevention.
Keep the lower edge of the bottom section clean and free of salt buildup during winter months. Wipe down lower metal surfaces to prevent road salt from corroding the panel steel and lower brackets. Check all hinge mounting screws every six months and hand-tighten any that have vibrated loose under regular daily operation.
When to Call a Professional Service Technician
While replacing intermediate hinges or adding a reinforcement strut to a mid-panel section is manageable for handy homeowners, certain repairs present severe safety hazards. Any work involving the bottom roller brackets, lift cables, torsion springs, or severe structural frame buckling should strictly be handled by experienced professionals.
High-tension components operate under hundreds of pounds of force. Attempting to disassemble hardware connected to springs or cables poses serious risk, a reality highlighted in home safety alerts issued by the U.S. Consumer Product Safety Commission (CPSC) regarding garage door system hazards. If your garage door has jumped off its path, has broken counterweight cables, or exhibits bent section ends near high-tension fixtures, seek professional assistance immediately.
For complete structural tune-ups, expert panel replacement, or urgent hardware service in Eastern Massachusetts, local property owners rely on skilled technicians. Our team delivers reliable garage door repair boston services, alongside fast response for garage door repair framingham ma homeowners. We also support regional property managers with comprehensive overhead door care, including dedicated partners providing saratoga springs garage door repair options.
Summary and Key Takeaways
Maintaining strong panel alignment and intact hinges keeps your overhead garage door system safe, quiet, and reliable. Ignoring cracked intermediate hardware causes stress to transfer into panel sections, leading to expensive structural damage and motor failure. By identifying loose hardware early, reinforcing damaged panels with steel struts, and keeping pivot bearings properly lubricated, you can protect your investment and avoid sudden breakdowns.
Inspect intermediate hinges regularly for metal hairline cracks, elongated screw holes, and rust formation.
Never tamper with or attempt to remove high-tension bottom brackets or lift cables.
Reinforce bent or creased sections with steel struts to distribute operational weight evenly.
Lubricate moving bearings, rollers, and hinges—never apply grease inside the garage door track system channels.
Match hinge stamp numbers exactly when replacing damaged hardware to maintain correct section spacing.
If your garage door has damaged sections, noisy hinges, or off-track issues, contact the team at Prime Garage Doors today. Our experienced professionals provide same-day service availability, free estimates, and 24/7 phone support across Greater Boston. Request a Free Estimate or Call Now at (844) 321-0914 to speak with a technician and get your overhead system running smoothly again.
Frequently asked
- Can I replace a broken garage door hinge myself?
- Homeowners can safely replace intermediate hinges on lower and middle door sections if the door is fully closed and clamped in place. However, you must never attempt to remove or adjust the bottom hinge brackets, as they are under continuous extreme tension from lift cables. For high-tension hardware issues or complex panel alignment, it is best to consult an experienced garage door professional.
- How do I know which replacement hinge to buy for my garage door?
- Most sectional garage door hinges feature a number stamped directly into the metal leaf to indicate its vertical placement. This numbering ensures the hinge offsets the roller correctly relative to the garage door track system. Matching the stamped number on your existing hardware ensures proper panel articulation and frame weather sealing.
- What causes garage door panels to crack or split near the hinges?
- Panels typically crack due to metal fatigue, loose hardware, or continuous stress from a binding door assembly. Extreme New England winter temperature swings and road salt exposure can also compromise metal panel strength over time. Installing horizontal steel struts across damaged sections helps redistribute weight and prevents cracks from expanding.
- Should I apply lubricant to the garage door track channels?
- No, lubricant should never be applied inside the garage door track system channels. Spraying grease or oil inside the tracks traps dust and debris, causing the rollers to skid rather than roll smoothly. Instead, apply garage door lubricant strictly to moving hinge pivot pins, roller bearings, and spring coils.
- Can a single damaged garage door panel be replaced without buying a new door?
- In many cases, individual cracked or dented panel sections can be replaced if the door model is still produced by the manufacturer. However, if structural bending spreads across multiple sections or affects high-tension hardware, replacing the full door assembly may be recommended. Experienced technicians can inspect your door structure to determine the safest solution.